November 13, 2012

Bonus Home Improvement Pics

written by Yvonne

As you know, this blog is primarily all about the garden. But I thought I'd throw in a bonus home improvement post since we've been doing a lot of it lately. And one of the home improvement projects actually leads into the garden update.

We've lived with it long enough! Company is coming in a few weeks and it's time to get the job done. And that job would be installing 1/4 rounds to finish off the floors in the areas we ripped up carpet.  Those areas are the main hallway, the master bedroom, the guest bedroom, and the library.

Thanks to our dear, dear friend Nolan (and man who has every tool imaginable) this job became a reality.  He graciously took time out of his Sunday to bring over one of his chop saws for Tom to use.


After lessons on how to use the saw to ensure Tom still had 10 fingers attached when he was done...


Tom was off and running.


Nolan gave thorough instructions on how to measure each piece, which end of the wood to cut first, and how to cope the corners so they look pretty and not just hacked off.  Coping all the corners took quite a bit of precision and time. Once the first pieces were cut, Tom used his brad nailer to secure the pieces in place.

Nolan also gave us an education in new workman fashion trends. He introduced us to the Longtail T (a.k.a. Crack Spackle) which solves the issue of  'plumber's butt'.  This item, along with Ballroom Jeans and Buck Naked Underwear, can be found at the Duluth Trading Company (www.duluthtrading.com). Even Santa needs a Longtail T


Longtail T fixes Plumber's Butt. Buy 2 or more, save $1.50 each


The Duluth Trading Company has GREAT ads for their products. (Click below to see the video.)


Here's one for Buck Naked Underwear. (Click below to see the video.)


But I digress....

Our floors are finally finished! What a difference it makes. It was a two-weekend project but that's because other projects were intermixed along with this one.  Here's a look at Tom's fantastic work.


Amid the 1/4 round project, we also had new blinds installed. The blinds that were here when we bought the house were 1", grayish, aluminum gross things. Getting them replaced is something we've both wanted to do very badly but we needed to save up some clams to buy them. So for 3 1/2 years we've learned to avert our eyes and not look at them. It was FINALLY time - we bought new blinds and had them installed. A few things we did on our own which saved quite a bit of money were:
  • We pick up all the blinds from Lowe's and brought them back to the house,
  • we took down all the old blinds, and
  • we shortened the new blinds that were much too long.
We would have had to pay extra for each of these tasks if the installer did them.

The blinds were installed on Friday and we admired them all that night and part of Saturday.  But every time I looked at the kitchen window (which was the area that actually prompted us to buy new blinds in the first place) I kept thinking it should look... I dunno, better, cleaner, more wow.  I mean the blinds themselves look great, but I kept thinking the whole window area should look cleaner and brighter.  Then it hit me.  The trim around the window is a dull, chipped yellow! EEwww! No wonder it still looked grungy!

Here's what it looked like - you can see the white window and the ugly, chipped, yellow sill and trim.


It took having pretty, new white blinds for me to really see how yellow the trim was.  So naturally ('cause I didn't have enough on my to-do list already) I broke out the trim paint and went to town.


Ahhhh - MUCH better!  (Disregard the messy kitchen.)


Unfortunately I didn't take a good 'before' picture in the kitchen so to give you an idea, here's a before and after of a bathroom window which was similar. Before - old blinds, yellow trim...


vs. after - new white blinds and white trim.


After shortening the blinds (thank heaven this only needs to be done once) I commented to Tom, "It's too bad we can't do something with all these extra blind slats. I hate to throw them away. Can you think of something to do with them?"  I fully expected his answer to be, "Can't think of anything right off the top of my head. Let's hang on to them; maybe we'll think of something later."  But nooo. Mr. Johnny On The Spot says, "Let's use them as markers in the garden instead of those itty-bitt plastic ones which you can't see anyway."  BRILLIANT!!!

One last little chore for the weekend; I sat down and wrote on our new plant markers.  We have a TON of slats left over so we'll have plenty to use for every season.


(Is this right?  It doesn't look right. Mesculin? Mesculum? Mesculum? Mesculun?)


Finally, it's time for dinner. Although it looks like it was midnight, it was only 7:00.  Tom made some yummy salmon patties out of salmon he grilled earlier in the week and then did a night harvest of lettuce for a dinner salad.


And of course, Olive was there to help.


Here's what the new plant markers look like in action!

November 5, 2012

From Fall to Winter

written by Yvonne

We had a busy, busy weekend with house and garden projects. In terms of garden...

We did good by planting half a Fall garden, but we didn't do so good because we planted half a Fall garden. Even though it's too late now (because at this point we should be harvesting, not planting), we went ahead and finished out the Fall plantings.  If this winter is as mild as last, everything we plant now should be no problem.  We'll just harvest in Winter instead of Fall.

Tom picked up a load of dirt and filled bed #4,


then I planted spinach, collards, and two types of winter squash.


Tom took the remainder of dirt and added it to bed #2.  After pulling up the peas and beans (which really weren't doing all that well), then tossed in rye seed, and topped it with compost.  The rye grass will add back nutrients to the soil that may have been lost.  In-mid January, we'll till the grass and compost under and let it 'rot', then the conditions will be perfect for spring planting.

October 29, 2012

Gutters and Hoop Houses

written by Yvonne

This past weekend was likely the last mild weekend before the cold comes.  It was BEAUTIFUL weather to be outside and we got a lot of work done.

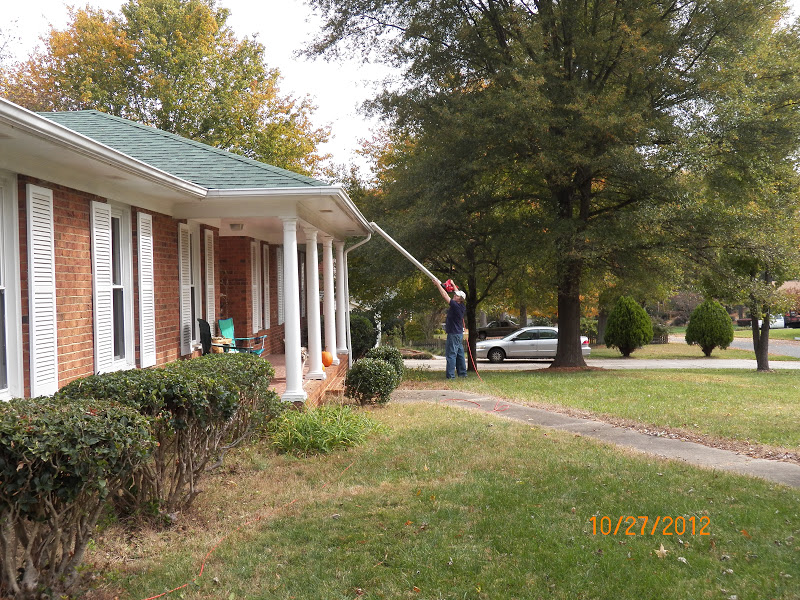
This isn't garden related but it was pretty ingenious so we thought we'd share it. The gutters have needed cleaning oh... since we moved in three and a half years ago. On our annual Fall drive through the country to get pumpkins and apples I happened to see a guy cleaning his gutters using a leaf blower.  He had a long tube attached to the blower and, while standing on the ground (not on a ladder), he was blowing leaves out of the gutters.  We did some YouTube research and Tom came up with a similar contraption.  He took two pieces of gutter (the part that runs down the side of the house) and slipped them over the end of the leaf blower and volia!  Gutters cleaned of leaves!


Now, onto garden news.

This is beans and okra.  I harvested the last few pods of okra and pulled the plants up.  I'll keep the beans in for a little while longer, hoping they'll recover from being eaten buy bugs.  They are putting out beans, but the leaves are decimated.  In a few weeks, we'll pull these out as well and plant rye grass.  Each year we are rotating which bed gets planted with rye grass.  Last year, it was bed 1, this year it's bed 2.  Doing this takes that particular bed out of fall/winter planting, but it adds back much needed nutrients so it will be ready for the next season.

Turnips are taking off...


but the carrots and beets are taking their time.


This looks like a mess because of the leaves, but all the green is actually garlic.


Cabbage (on the left side of the bed) is doing great.  I suspect we'll have to thin them out pretty soon because they get HUGE.


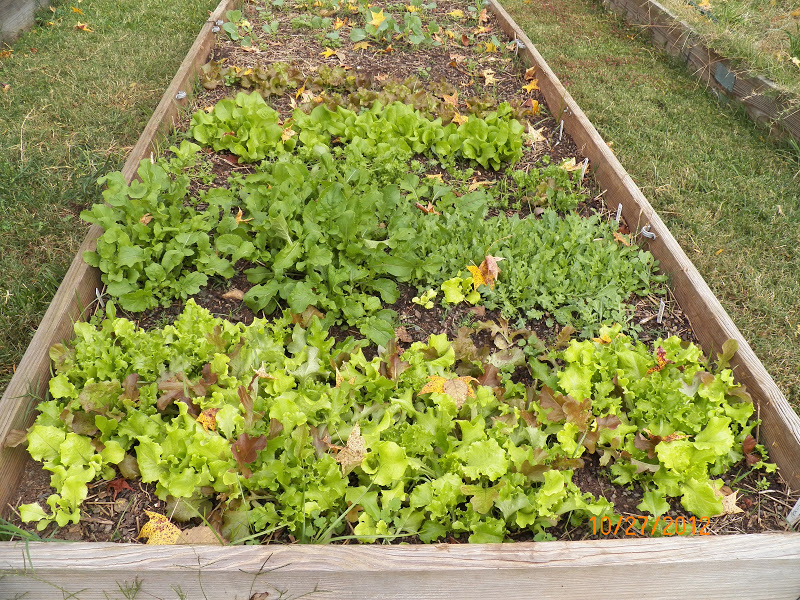
Wanna see something super cool?  The first lettuce photo below is dated 10/15.  The second is dated 10/29.  In two-weeks time the lettuce went from sprouts to a full out!


As such, we had our first salad of the season with dinner last night and had enough for lunch today.


We let bed #4 go to weeds during the last half of summer.  Now it's time to dig it all out and prepare it for planting.


I pulled out the cowpeas (much to Tom's disappointment)...


and cleared the whole thing of weeds.  Once the weeds were gone, it became evident that this bed needs more dirt so we'll have to wait another week or so to plant anything until more dirt is added.  We're WAY too late for planting more fall crops (of course) but we'll throw seed down anyway because our winters are fairly mild and we should be able to get collards, spinach and squash growing through the winter.  In the very front corner of the bed, you can see a splotch of green - this was a bit of parsley still hanging on that I dug out from the weeds.  I left it in so it can thrive.


This week the temps will be dropping into the high-to-mid 30s so it's time to get the hoop houses up so we don't loose anything.


This morning I pulled out all hoop house pieces so we could take an inventory and get anything else needed to get all three beds full coverage.


Many of the plastic C clamps broke off when I put the hoop in so when Tom goes to Lowe's tonight, he's going to investigate other clamps that may tolerate weather better.


October 23, 2012

Short and sweet

written by Yvonne

Not a whole lot to report, but our fall garden is getting a very good start.

We are gonna have a TON of lettuce. Salads for everyone!


Cabbage is coming up as well.


Garlic took off right away.


Carrots slow but coming up.


Turnips are sprouting as are the beets. However, the beets aren't moving as fast as the turnips.

October 3, 2012

Make way for Fall

written by Yvonne

We're a few weeks behind schedule to get our Fall/Winter garden in the ground, but all things considered that's not too bad.  Last week, Tom got one bed cleared out, now it was my turn to clear one out. It was a big pain to cut the tomato limbs from the growing spirals, but I stayed at it until I freed the spirals completely.


All the tomato plants were ready for the compost pile.


It's tough to pull plants out when there are still lots of tomatoes on the vines, but ya gotta do it if you're going to get the next season's seeds down. Maybe when we add another bed or two we'll have enough space to keep some things going while starting the next season's seeds.


The jelly bean tomatoes are fun to eat but man were they a pain to pick out of the soil, one by one.


Eventually, I got everything out of bed #1 and then measured out space for garlic, carrots, beets and turnips.


The garlic comes in bulbs so I had to separate them into individual cloves.


Into the compost went the tomatoes.  On Sunday we were able to sow cabbage and 6 types of lettuce in bed #3.


Before I started pulling out items, Tom went through and did a real thorough harvest.  He pulled up all the marjoram and a big bunch of basil.  The orka plants are still in the ground but he harvested some that was ready to eat.


A lot of the tomatoes were very green and he promised me a southern meal of fried green tomatoes and orka. Hopefully, that'll happen this week.


Last little beauties for the year.


More cow peas.


He harvestest two window sills worth of partially ripe tomatoes...


as well as a ton of green tomatoes....


and a colander full of jelly bean tomatoes.


And with some of that, he made us lunch!